Let me introduce you to our kitchen.
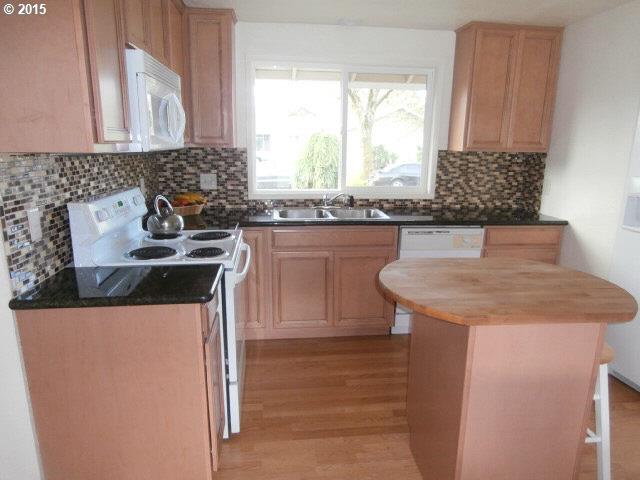
The kitchen as seen in the MLS listing
It isn’t a large kitchen. It also isn’t fancy. There are a few things I like about this kitchen, but there are also things I very much dislike.
I like the large window, the island, the way the cabinets go all the way up to the ceiling and I like that we have a dishwasher.
I don’t like the electric stove, but in this part of the country where gas lines don’t exist it’s something I just have to accept. I don’t like that the dishwasher is old and all the racks inside are rusty. I don’t like that the appliances are white, and I don’t like that we have a range hood/microwave combo. All of these things I can live with for now (the rusty dishwasher parts will be re-coated with a repair kit so don’t worry about me needing a tetanus shot every time I wash dishes).
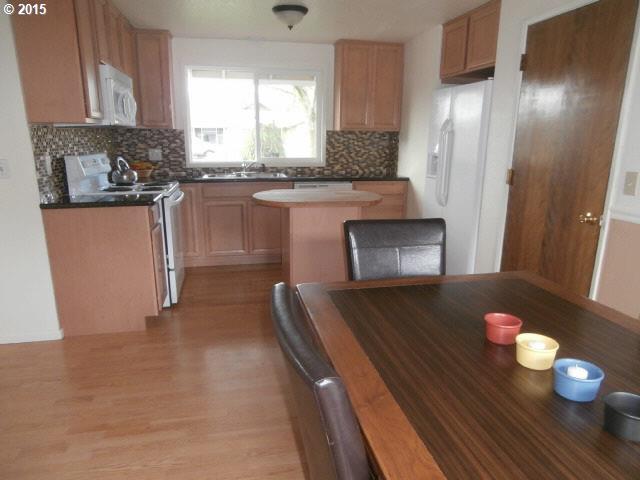
View from the dining room. Boob light clearly visible.
What I really didn’t want to live with was the cabinets. More specifically the cabinet color. The previous owners clearly did as cheap an update as they could and didn’t install solid wood cabinets. Instead we have poorly installed cheap particleboard cabinets covered in wood grain laminate. They were an odd peachy tan color with brown faux-antiquing gunk in the corners and on the edges. For me, that was the worst part. I’m really not the biggest fan of the shabby chic look, especially when it makes my cabinets look like they have years of built up cooking grease all over them. It just looked dirty and gross. Yuck.
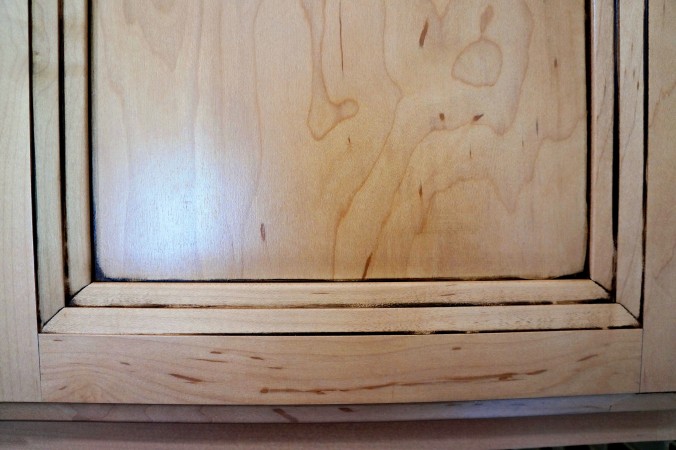
Stupid faux antiquing. It looks so grimy!
Since the only affordable option for an update was paint, that’s what we (or really, I should say I) decided to do. The tricky part was picking a color. I love the look of an all white kitchen because I think they look clean and bright, but we worried our white appliances would look even more dingy than they already do if they were next to shiny white cabinets. My second choice was navy, but that wasn’t going to look very good with our black, brown, and cream backsplash. This wasn’t the deal breaker on the navy cabinets though. That was caused by the black counter tops.
I think I am the first person ever to say this, but I wish our counters were laminate. If they were, I could have gone with the cement coating route and been very happy. It would have fit in great with the industrial feel we’re trying to achieve and would have looked awesome with navy cabinets. But instead of cheap laminate we have granite. Yes, I am complaining about having granite counters. I still don’t really understand why the previous owners installed cheap cabinets and an expensive counter, but I suspect they heard granite was a big “selling point” and figured it would trick buyers into thinking the kitchen renovation was more well done than it actually was. Anyway, granite isn’t my favorite stone for counter materials despite the fact that it’s low maintenance, doesn’t scratch, doesn’t stain, blah blah blah, because I think the pattern is often too busy which makes it difficult to tell if it’s actually clean. In the case of our counters, the material isn’t even the biggest issue. The biggest issue is the color.
Our counter top is black with little iridescent patches and some gold/brown swirls. You might be thinking “Well, that doesn’t sound that bad!” But let’s play a little game where you think up colors that would look good with a black counter, off-white appliances, and the black, brown, and cream backsplash. How many colors can you think of? Now you know our struggle.
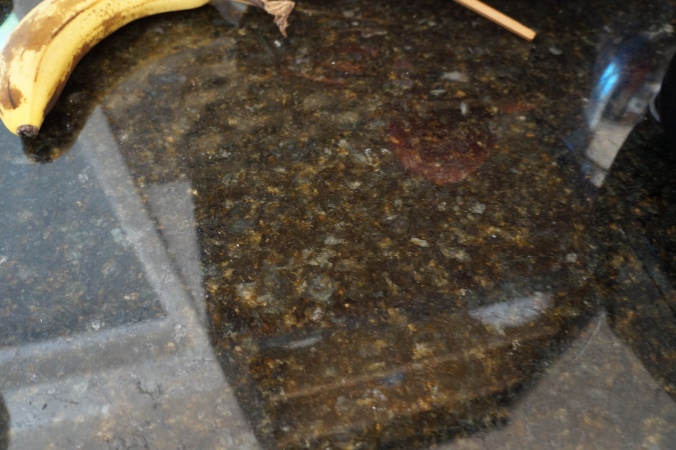
Close up of the countertop
So, what color did we actually decide to pick? Black. I know a lot of people don’t like black cabinets because dark colors tend to make a space look small, but we get enough light from the big window over the sink and the patio door off the dining room that I don’t think we’ll have this problem. Plus, we don’t really have that many cabinets so the black color shouldn’t overpower the space. For something fun I chose to paint the insides gold. Our new kitchen will hopefully have a moody luxe feel and I am super excited about it!
Now, remember how I said the cabinets were covered in wood grain laminate? Yeah, it turns out even the “I stick to everything” Zinsser Bulls Eye Primer doesn’t stick to these suckers. So after trying to do this thing the simple and easy way by just washing and priming, I ended up having to sand off a layer of peeling paint as well as the ultra smooth finish before everything finally behaved the way it should. Oh, and since I had to sand off the fruit of Scott’s two day labors, he’s not exactly keen on helping me do anything else kitchen paint related. The rest is all on me.
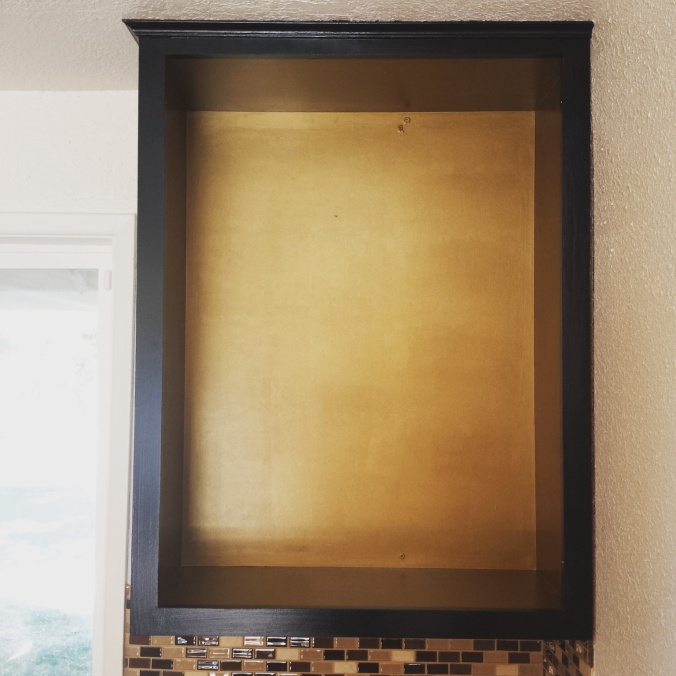
They turned out even better than I expected!
So, I have finished painting the cabinet boxes and we’ve have finally been able to store our dishes like adults rather than having them piled on our dining room table and a plastic shelving unit. Still on the agenda is adding black contact paper to the shelves, sanding and painting the doors, along with painting the island and refinishing its butcher block top. I’m really excited to start using that. It’s mostly functioned as a tool storage zone because a) we had no other place to put tools while I was working on the painting, and b) I didn’t think there was any way I was going to be able to clean the surface enough where I would feel comfortable cutting food on it. Who knows what kind of fluids may have soaked into the wood surface before we moved in? Yuck x 2.
My goal is to have this kitchen painting project complete by the end of August. Wish me luck!
-Steph


